
The decision to use specific infill patterns allows practitioners to engineer the internal characteristics of an object to meet high-impact resistance or weight-bearing requirements. In the current landscape of Fused Deposition Modeling, these internal structures act as the invisible backbone of any physical model, bridging the gap between a fragile hollow shell and an unnecessarily heavy solid block. While the exterior surface provides the aesthetic finish, the infill ensures that the part remains dimensionally stable throughout the printing process. This is particularly critical when dealing with flat top surfaces, as the infill provides the essential support required for the printer to deposit layers over open spans without sagging. Unlike resin-based technologies like Stereolithography that produce solid parts by default, filament-based printing utilizes software-controlled geometries to manage material distribution effectively. This architectural control is a key cornerstone of modern manufacturing.
The Impact of Infill Density on Print Performance
Balancing Material Consumption: Structural Integrity
Infill density is typically measured as a percentage, representing the ratio of thermoplastic material to air within the interior volume of a 3D-printed part. A setting of 0% results in a completely hollow interior, while 100% creates a fully solid object; however, most engineering applications from 2026 to 2028 favor a middle ground to optimize both cost and performance. For decorative prototypes or non-load-bearing components, a density ranging from 10% to 15% is often sufficient to maintain shape and support the upper layers. Increasing this value beyond 20% leads to a sharp rise in material consumption and total print time, which can bloat manufacturing costs without providing proportional benefits in strength. Precision in selecting these values allows for the creation of lightweight parts that possess the necessary rigidity without the penalties of excess weight. This strategic calibration is vital for industries like robotics, where every gram of saved mass contributes to efficiency.
Advanced Wall Strategies: Beyond Internal Fill
A common misconception in additive manufacturing is that higher infill density is the primary driver of structural durability. In contrast, empirical testing reveals that increasing the number of perimeters, or outer walls, often provides a more significant boost to a part’s resistance to mechanical stress. By adding one or two extra wall loops, a user can achieve a much stiffer and more resilient component than they would by simply increasing the internal density from 20% to 50%. This approach not only enhances the physical properties of the print but also preserves the speed and material savings offered by a lower infill percentage. Practitioners now frequently use a combination of moderate infill and increased wall thickness to create functional tools and end-use parts. This dual-layered strategy ensures that the stress is distributed along the perimeter where it is most often applied. Balancing these two settings is the hallmark of a sophisticated approach to 3D printing in the current manufacturing era.
Selecting Pattern Geometries for Specific Applications
Geometric Shapes: Matching Mechanics to Needs
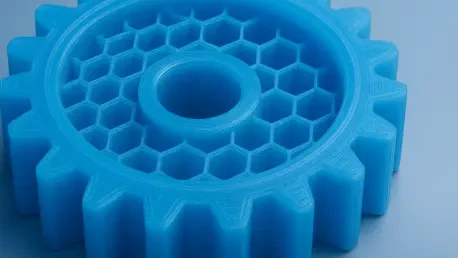
The choice of a specific infill pattern is just as influential as the density setting, as different geometric configurations offer unique mechanical advantages. Simple 2D patterns like the Grid provide excellent vertical compressive strength and are easy for most printers to execute at high speeds. However, for parts that must withstand forces from multiple angles, 3D patterns such as Cubic or Gyroid are far superior. The Gyroid pattern, in particular, has become a preferred standard for functional parts because it offers isotropic strength, meaning it performs consistently regardless of the direction of the applied load. Furthermore, because the Gyroid pattern consists of continuous waving lines that never cross within the same layer, it minimizes the risk of the nozzle catching on the plastic during rapid movements. This reduction in mechanical interference translates to higher print success rates and improved surface finishes. Selecting the right pattern ensures that the internal geometry aligns with the intended use.
Strategic Omissions: When to Print Without Infill
While infill is a fundamental requirement for most geometries, there are specific scenarios where it can be omitted or drastically reduced to save time and resources. Objects with steep, tapering angles—such as vases or certain artistic sculptures—are often self-supporting and can be printed at 0% infill with excellent results. This technique relies on the vase mode settings found in modern slicer software, which creates a single continuous wall without internal support. For models that require support only for their top surfaces, specialized patterns like Lightning have been introduced to generate structure exclusively where the ceiling layers begin. This avoids wasting material in the base or middle sections of a print where internal strength is unnecessary. Understanding these nuances allows makers to push the boundaries of what is possible, moving beyond generic settings to achieve specialized outcomes. This level of optimization is essential for high-volume production where material savings accumulate significantly